 |
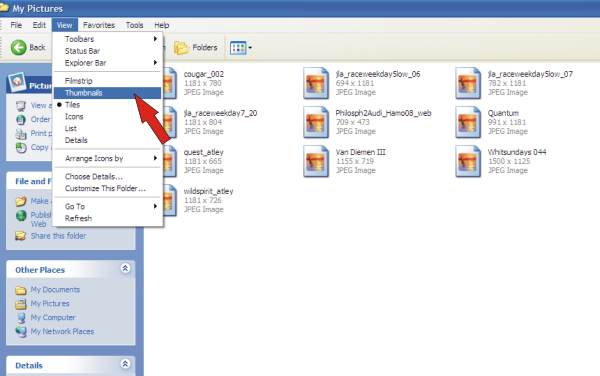
Go into your "documents"
file to retrieve your pics, or whatever folder you have saved
them in. These files usually default to icons and I like to look
at the thumbnails instead so here is how to change the "view"
of your folder. Left click where indicated. |
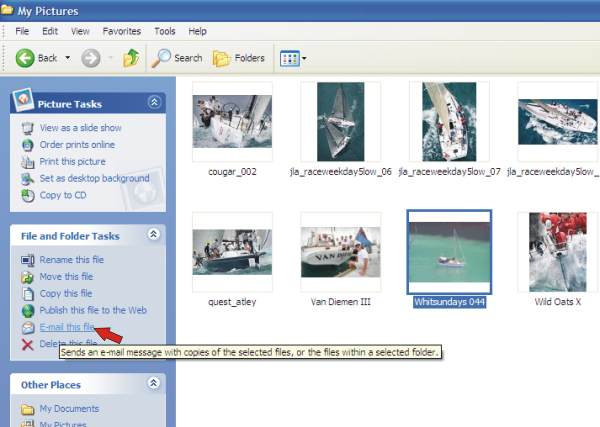 |
If you don't have the "Tasks"
tool bar on the left of your screen as shown in this photo, then
proceed to the next image below.
Now left click on the photo you want
to send to select.
If you want to select more than one,
hold the "Ctrl" key on your keyboard down while you
click on each one you want to select.
Next left click where indicated by the
red arrow. |

|
If your program is configured
so the "tasks" tool bar isn't on your computer you
can go about sending this way...
Select one or multiple images (press
"Ctrl" key as you left click on each photo) and then
right click on the photo or any one of multiple photos, and click
on, Send To>Mail Recipient. Then proceed to next step. |
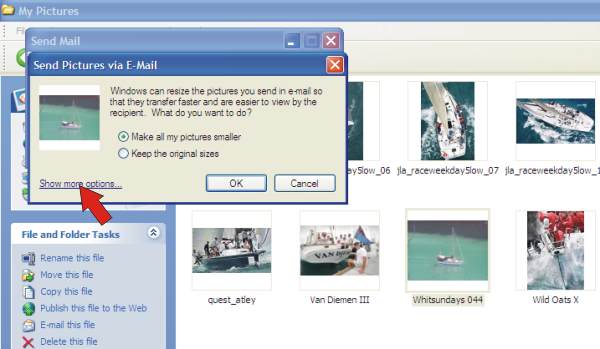 |
This screen comes up and gives you
the choice of very small or full size. Since many boats are using
a mobile phone to transmit, a full size can be prohibitive of
transmit cost/time whilst the default smaller size is too small
to use in print but for normal mailing and sharing of photos
the small size should suit but for other uses where a little
bigger size is needed, left click where indicated |
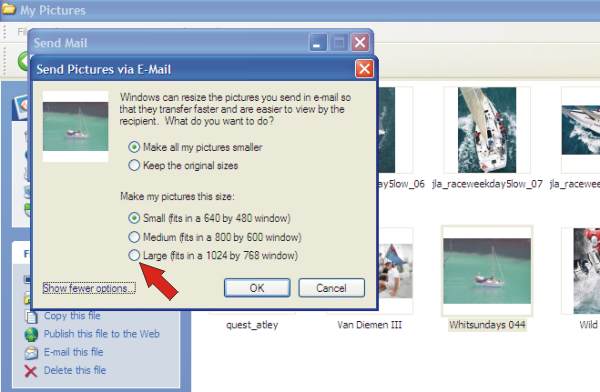 |
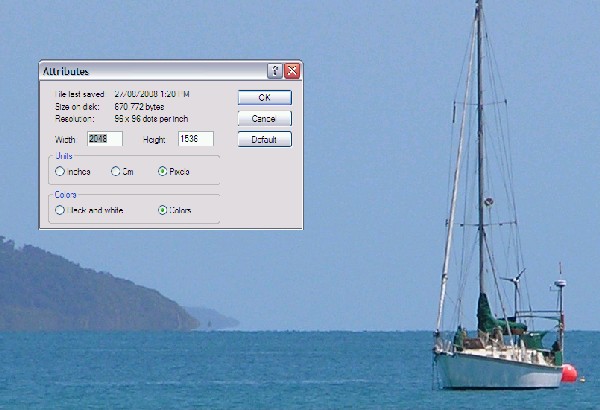
With this screen you can select larger
sizes. The numbers they show are pixel widths. The pixels are the individual small
dots of colour that make up a digital
image. The largest of this range can make a size usable for
some features where the photo print size isn't too big. So, select
the size you wish and click "OK". |
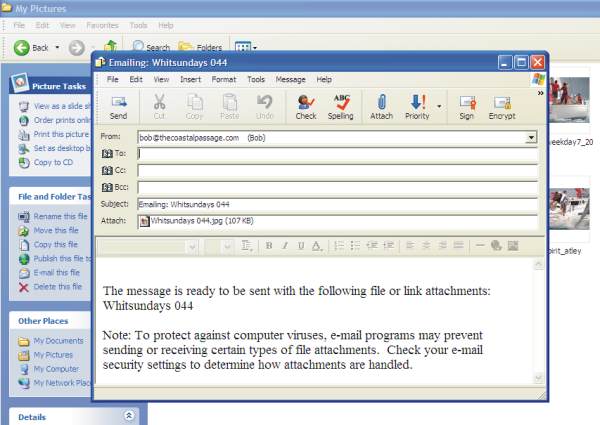 |
Then a window will pop up with a
ready to send email message with your photo(s) attached. Click
on the little address book on the left or manually type in the
address and then put in your text below. You can select and delete
the text that comes as a default on the screen. Note that the
photo is about 100 kb. The default setting for this photo would
have been a quarter of that size. |
|
A note on the process above...
if you want to downsize photos for something like a web page,
here is an easy shortcut. Select all the photos you want to resize
and then select, "email this file" and then insert
a bogus email address in the "to" bar and save in "drafts
by clicking the red exit button. Once in drafts you can save
the photos where you wish. This not only reduces the physical
size but "compresses" the
photos, further reducing the "file
size".
Now follows instructions on two programs
that can resize photos easily. If you have windows, you will
have at least one of them. |
|
 |
Microsoft
Paint. Right
click on the photo in your documents and select ; open with>Paint.
(see below left) With your photo opened in the program click
on "image>attributes" and the box at left will pop
up. Choose the units preferred. (suggest pixels) and replace
the number highlighted and insert the desired number and hit
OK then save. The height will adjust automatically with your
width adjustment. |
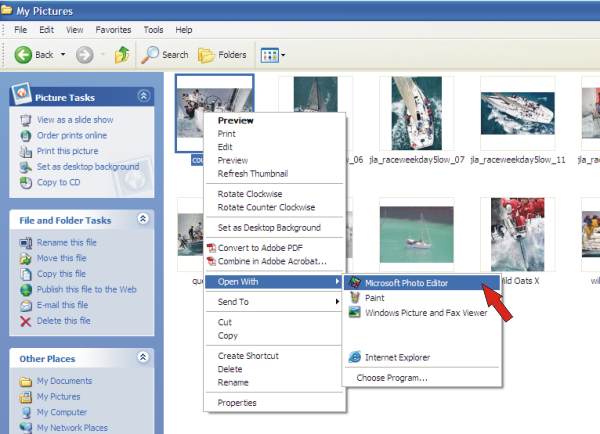 |
Microsoft Photo Editor
To access the program, go into the file
in your "documents" and RIGHT click on the photo and
proceed as indicated by the arrow. Click on "Photo Editor".
This program comes as part of the older MS office suites. Still
a common program and useful. |
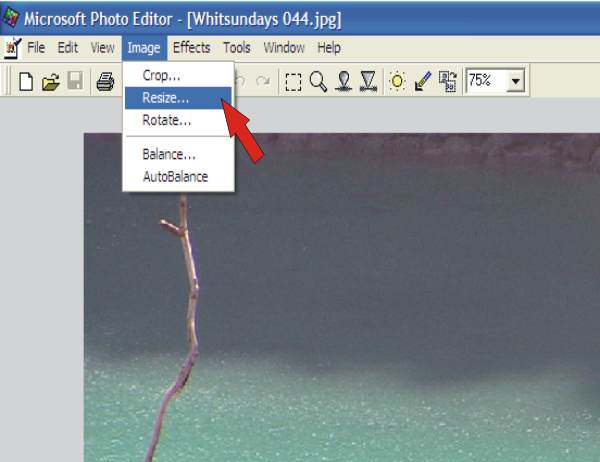 |
Your photo will open in a new window,
click where indicated. |
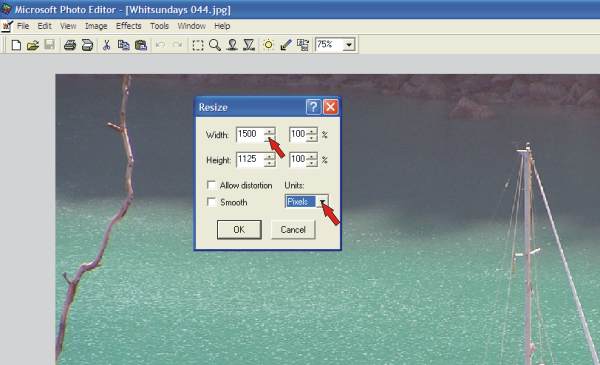 |
Then a small window opens on the
screen. Under "units" I recommend "pixels"
as it makes easier sense to me, but you can select cm or inches.
This photo was 2500 pixel width and I've scrolled down the control
to 1500 which will make a photo about 300 to 500 kb which is
very useful for TCP and still not bad to send. You can use the
"%" option to adjust also. |
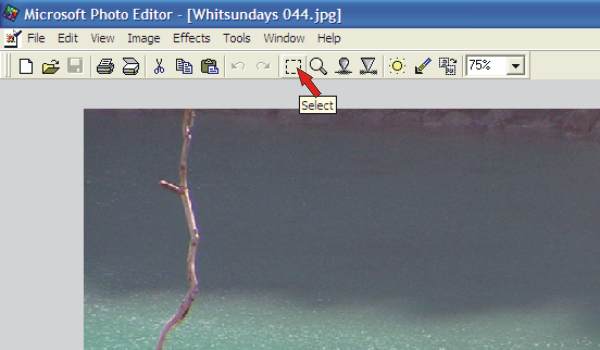 |
For sending photos to TCP please
do not crop. that's my job! But
if you do want to for something else this program can do it.
If you noticed the image above for resizing, it also had a button
for "crop".. don't do it! There is a much better way.
Click where indicated by the red arrow. Then..... see below; |
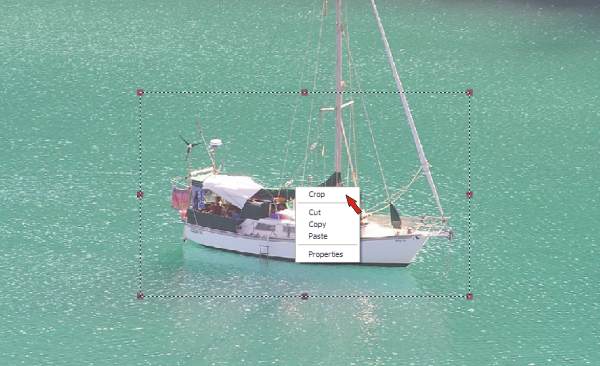 |
Now take the cursor to one corner
of the area you want to crop, left click and hold as you drag
the cursor across diagonally and then release. You can now grab
corners or sides and fine tune your crop, then RIGHT click in
the crop area and this screen will come up and click where indicated
by the red arrow. Everything outside the box will disappear. |